

I’m back! You know when life happens and then all of a sudden it’s been almost three weeks and you’ve not accomplished what you wanted to? Well, that’s what happened to me, so I sincerely apologise for the hiatus – life/work/motivation imbalances have caused me to not post to my 2 week schedule. Even though I provided a (nearly) full face of makeup posts throughout March, I do in fact have some leftovers that didn’t get finished in time in March, so here is the first of two of the March Makeup Month Leftovers.
Time Required:
7 Minutes Reading Time
Takeaway:
Contour and highlight have been a huge focus in the makeup world for the past few years, almost as much as the focus on brows has returned. In this slice I’m talking about how to get that “natural” contour look, and how to make it work in an everyday way.
The Slice: Contour & Highlight
So first up, let me give you a little contour and highlight history if you weren’t already aware of it.
Contouring, in particular, has been around for decades. Yes – decades. Kohl and soot was used to contour theatre performers’ faces in the early Elizabethan period, so that the audience would be able to see their expressions more clearly. Fast forward to the 18-1900s and the use of artificial lighting had made expression reading much easier, so the performers had to use different formulations to make it less obvious that soot was being used, but still be able to define their facial expressions. Moving further forward to between 1920-50 and you’ll start to notice the very well shaded and contoured faces of actresses in film, such as Marlene Dietrich, Audrey Hepburn and Elizabeth Taylor (the latter two using more subtle techniques due to the advances in technology and makeup artistry with the likes of Max Factor and Ben Nye creating products specifically designed to contour).
Similarly, highlighting has often been used in theatre and film throughout the years, with the makeup artistry helping the actors facial expressions to be seen clearly from any area of the theatre. Both contour and highlighting techniques and tricks remained more of an industry speciality until more recently when they really hit the makeup mainstream with Kim Kardashian’s famous “contour selfie” posted back in 2010. Sure, you might have known or heard about contour and highlighting before 2010, but did you really know or hear about it as much as you do now? Even my husband not just knows but UNDERSTANDS what contouring and highlighting is.
Whilst contouring and highlighting have become so incredibly popular within the last few years, it still can be quite a difficult makeup look to perfect, and it can very easily go wrong. Here I’m going to talk you through how to achieve a natural looking contour and highlight, with my go to products and tools.
Contouring
The Oxford dictionary defines contour as “an outline representing or bounding the shape or form of something”. As contour helps to give depth and shadow to an area; you can quite literally change the shape of your face with a well executed contour, but remember that it is used to create shadow, which is why reshaping is best left to the experts. When contouring on yourself try to accentuate what you naturally have rather than create something new (unless you have the time to practice and pull this off properly). It is advisable to use products that are two shades darker than your natural skin tone. Read that again: two shades darker than your natural skin tone.
My personal preference is that a strong contour is really best left for nights out (because it’s dark and the only photos you tend to take will be using a flash) and photoshoots (or a good ol’ Instagram selfie). When it comes to contouring I prefer to use cool shadow toned powder products, rather than cream sticks. I think cream products are absolutely fine, but you really need the time and inclination to spend blending.
Recommended Products
Powder Contour
Kevyn Aucoin Sculpting Powder – £35.00 at Cult Beauty
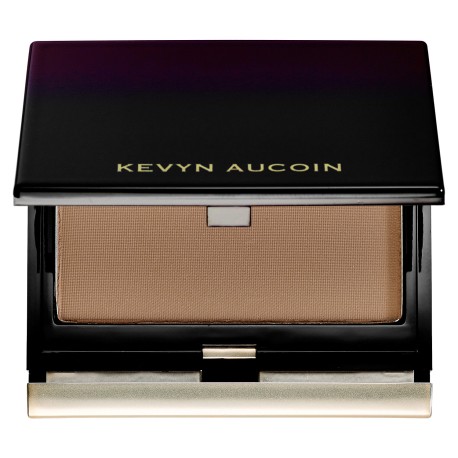
I picked up one of the wonderful Kevyn Aucoin sculpt and highlight duo mini’s from a Sephora in New York after hearing so much about both of the powders on various YouTube channels. Unfortunately you can only get the On The Go mini in Sephora in their travel section (or by the tills), but if you have got the money to invest on the full size then I can guarantee it’s definitely worth it.
I use the colour medium, even though I am very fair skinned, and I use it sparingly and with a very light hand. My go to brushes for a light powder contour look are either the Real Techniques Contour Brush which you can find in the Flawless Base brush set, or the Sephora Small Contour Brush. Some people prefer to use the medium shade over the light shade because light is quite literally a natural shadow colour for pale skin, which is why it is so marvellously unnoticeable to the untrained eye.
For alternative, high street ashy toned powder products, try the Barry M Contour Kit or the Sleek Contour Kit in your preferred colour, remembering to use the shadow tones and not the bronzer for contour. Of course, you can absolutely still use bronzers for contouring, but this is best left for skin tones that are darker or more sunkissed than pasty, pale white girls like me *sassy emoji*.
If you choose to use products that are more than two shades darker than your natural skin tone, then do use the product lightly and build up by blending with a very light hand. This is where contour can go so, so wrong, and you instead can end up with a dark line or smudge that looks totally out of place underneath your cheekbone or on the sides of your nose.
Cream Contour
Collection Precision Contour Stick – £3.99 at Superdrug

As mentioned above, I don’t often use cream products for contouring, as I don’t have the knack or patience for blending them out as well as I can a powder product. If you are a fan of cream contouring though, perhaps try the Collection contour stick; they come in light, medium and dark, but personally I would opt for the light as, again, it has the best cool tones to it which provide a more natural shadow appearance. The only problem is that it will only maintain its “precision” name as you stick to the top nib of the stick, but once you’ve used enough product to need to wind it up it will generally have a flatter, fatter appearance and will benefit you more for quick application to the larger areas of the face, and perhaps not so much around the nose.
An alternative is the Topshop Contour Wand, which I have shied away from because of the darker tone, but have equally heard rave reviews about.
I used to be a big fan of contouring with my Chanel Soleil Tan De Chanel Universel bronzer, which is by no means a cool toned product. If/when I contour with the bronzer I use a flat brush, like this Clinique Concealer Brush, to swipe the cream bronzer underneath my cheekbones and on my temples, jawline and either side of my nose, and then blend with a damp beauty sponge. I would set this with a light, ash toned bronzer to ensure the look isn’t too warm, where I’m trying to create shade.
Highlighting
So to contour is to create depth, then to highlight is to (slightly obviously) create light. When you create light on your face you are generally accentuating and bringing forward the highlighted area (ergo a highlighted cheekbone that is POPPIN’). Try to use products that are two shades lighter than your natural skin tone for areas where you are cream highlighting, e.g. undereye, bridge of the nose, above jawline and forehead, and for accentuating highlightslight and shimmery products work best, e.g. on the highpoints of your face – top of cheekbones cheekbones, bridge of the nose, browbone .
As I’ve already talked about highlighting concealers in my Concealing post, I’m going to focus instead on the accentuating highlighters here.
Recommended Products
Powder Highlight
Kevyn Aucoin Celestial Powder in Candlelight – £35 at Cult Beauty

The highlighter in the duo I picked up is in the shade Candlelight, which is so insanely perfect for my pale skin that I’m pretty sure it might have been made just for me (seems legit). This shade creates the perfect natural glow to the tops of the cheekbones, which is my preferred highlighter look rather than the “out of space” glow that you see on Instagram, but you can also build up the highlight in layers if you are going for that look.
MAC Soft and Gentle Mineralize Skinfinish – £24.50 from MAC

There’s a reason that this is a cult product, and the reason is that it is universally perfect for all skin tones and highlighting purposes (bold claim – please don’t ask me to verify this as a fact). This is my favourite and go to evening highlighter, and despite it looking quite orangey in the pan the actual colour payoff is far from that. The moment that you swatch this velvety soft goodness, you’ll see a slight bronzed undertone, but the overtone is a light luminous finish. The glitter pigments in this highlight are not too big either, unlike some baked highlighters I’ve come across.
If you’re not sure whether this highlight is for you, you could try the baked highlights from the I Heart Makeup range available at Superdrug. I keep swatching these guys in the store, not because I’m in the market for a new highlighter, but to keep checking whether they are as good as I keep thinking they are every time I’ve gone in and swatched them. The I Heart Makeup range is absolutely killing it with their baked blush and highlighter range, so I would definitely recommend checking them out if you are on a budget.
For application; I prefer to use a fan brush or travel sized, pointed foundation brushes for applying powder highlighters.
Cream Highlight
Topshop Cream Highlight in Polished – £10 from Topshop

Unlike cream contouring, I am a HUGE fan of cream highlights, however I prefer to use these in the warmer months when I’m going for the dewy, gleaming (not sweaty) skin look.
The Glow highlighters from Topshop are really great cream highlights; best used with a stippling brush, fingers or a damp beauty sponge. My favourite is the Polished shade, because it’s pale but has really beautiful incandescent blue and pink flecks through it that really suit my skin tone.
MAC Strobe Cream – £25 from MAC

Since finding the Strobe cream online for this post I’ve come to find that there are now multiple colour tones that you can purchase the strobe cream in!? I can’t be sure, but I feel like I must have purchased mine before they had varying tones. I’ve looked a little further into it to check which undertone I have, and I think I own the strobe cream that has the Pinklite undertone and pigments.
The strobe cream has a beautifully light texture that almost feels more like a moisturiser. You can add this to your foundation to give an all over glow, or you can simply stipple the cream lightly onto the high points of your face with your fingers to create a glow in distinct areas on the face. This product will also last you a VERY long time!
The Tips & Tricks
Got all the gear but no idea? Here are a few “how to’s” that might help!
Pixiwoo – How to Create a Natural, Wearable Contour – 15 minutes viewing time
In this video Nicola Chapman is showing you the basics of contouring, predominantly with cream highlighters.
Lisa Eldridge – How to Contour with Powder – 9 minutes viewing time
All hail Queen Eldridge and her magical makeup techniques. Here Lisa is showing how to create a natural contour with powders.
Teni Panosian – Everyday Highlight Makeup Routine – 9 minutes viewing time
Teni is an avid fan of cream highlights, and in this video she’s showing you how to create a natural highlight with (you guessed it) cream highlighters.
Desi Perkins – How to Strobe/Highlight – 8 minutes viewing time
I love watching Desi’s tutorials, but she does a lot of looks that I find unwearable due to the amount of product on the skin. If you want a tutorial to know how to strobe (which is essentially just amplified highlighting) then this is a good one for you! This is that “outer space” highlight I’m talking about above.
How to Infographics:

I love this infographic, because it shows how you can contour and highlight for your face shape, and also you can use this to guide you to how to change your face shape with contour and highlight if you wanted to. For further reading you can visit this article which gives a breakdown on how to apply the contour and highlight principles for your face shape.
I hope this was useful for those of you that wanted to know a little more about highlighting and contouring, or for those of you interested in a little product review. Let me know what your favourite contour or highlight products, tools or techniques are! I’ve also provided below some additional sources on contour and highlight in case you’re up for some additional reading.
See you next time – Swope x

Love the MAC strobe cream, great post! 🙂
LikeLiked by 1 person
Ugh I love Kevin A. 💜 great read
LikeLiked by 1 person
Such a great product! And thank you!
LikeLiked by 1 person
Gorgeous pic!
LikeLiked by 1 person
Lovely Post!
LikeLike